
Thank You for Purchasing the Turbo Before & After Photo Gallery. Here’s a detailed breakdown of what you’ll need to get started.
Here is the easiest and fastest way to get started.
Expert Installation and Configuration is available for purchase here.
Here is the easiest and fastest way to get started.
- Follow the instructions to install the plugin on your WordPress website.
- Make sure you have patient consent for photos you upload to your Gallery.
- Organize your before and after photos on your computer. Start by deciding how your “Top Level” Organization will work, then how you would like each of your Subcategories to work. Under the subcategories you will place each “Case” or Set of Before & After Photos. For Example: Your “Top Level” categories may be “Breast, Body, Face, Skin”, and then you can place your individual procedures under each of those categories, and each cases within those procedures.
- Prepare Your Photos and Do a Bulk Resizing of Your Images. For more info, click here.
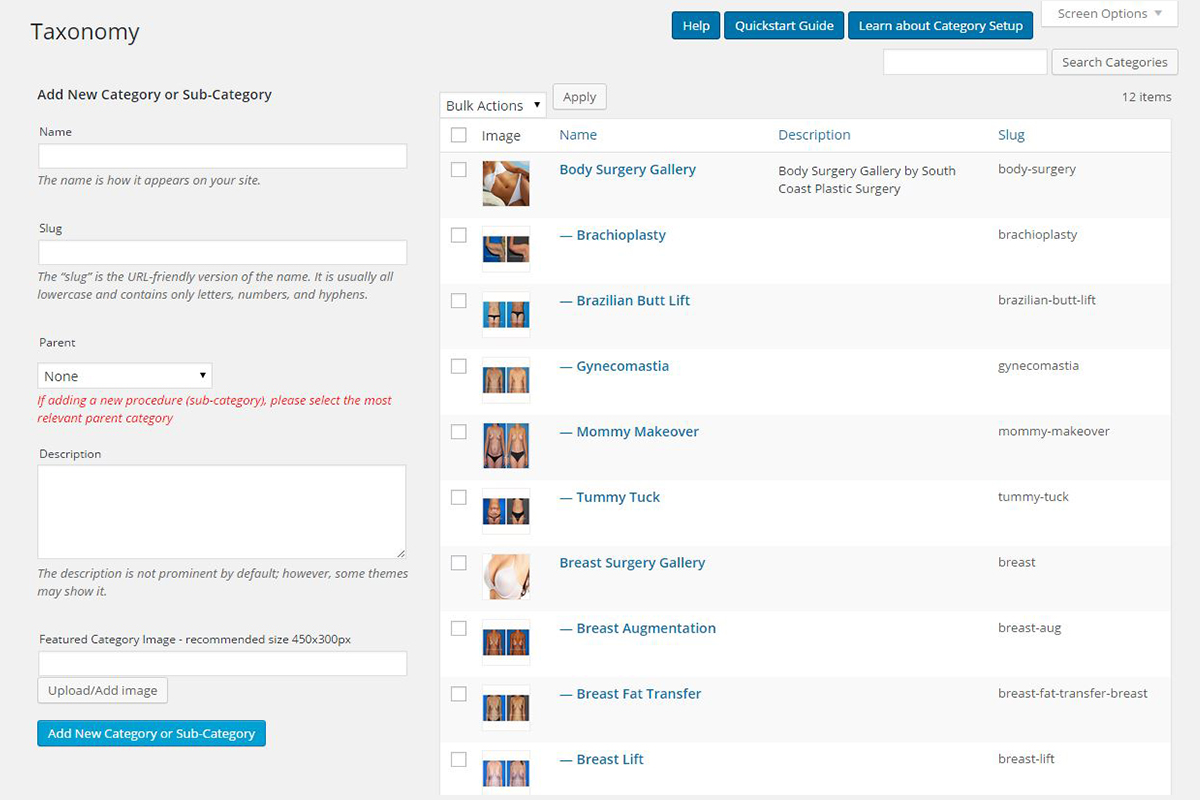
- Once you are organized, go through and create each Category and Subcategory in the “Categories” Section. It is here where you can also add the Featured Images that will appear on in your Category and SubCategory sections on the front of the website. To Create a Subcategory, just Create the Category first, then select the Category in the “Parent” dropdown. For more information on Taxonomies, click here. Here is a sample:
- Next, it is best to plan out your filters if you choose to use them (you can always add them later, however, it will just create additional work for you). Figure what details you would like your gallery visitors to be able to sort by within each Category, or Subcategory. Some examples for this would be “Male or Female” and “Age Ranges” for Category levels, or “Implant Size”, etc for Breast Augmentation. For more information on Filters, visit that article here. Here is an example of a filters setup:

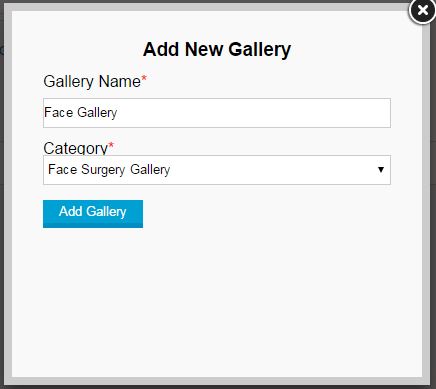
- Now its time to start adding your cases! First, Navigate to “Manage Gallery(s)”, then click on the “Add Category” button and Select the Top Level Category you created in Step 2 and you want to work on using the dropdown menu.
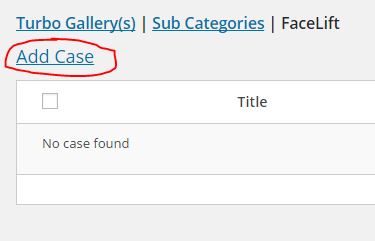
- Give the page a minute to reload itself, then click on your new gallery’s title. It will take you to a screen where all of the Sub Categories you added in Step 2 are located. Click on the Sub Category where you would like to begin adding cases to, then on the next screen click “Add Case”.
- First Add Your Case Title and Select the Sub Category you want to add the case to. Then make sure you fill out as much information about the case as possible. For SEO, Make sure you add the name of your city to the “Meta Title” area as well as the name of the procedure. For the “Meta Description”, write a short sentence summarizing the case. When you are done with this, press the “Publish” Button. Once the page saves and reloads, then a button will appear that says, “Add Images”. Click on the “Add Images” button to go to the upload area.
- Add the each pair of before & after images you want for that case. You can “drag and drop” to re-arrange the image pairs. Also, choose the pair you would like to show up in the preview for that case by clicking the radio button next to “Set Featured Image”. We recommend choosing the same angle of photo on each case to get a uniform look.
- Now add all of your cases the same way.
- To protect your images, we recommend using the watermark feature with your logo. To learn more about this, visit the knowledgebase on this setting.
- Once you are happy with the cases you have in your gallery, set your gallery live by following the instructions here.