
You can add the filters at the beginning before you add all of your cases, or go back and add them later once you have a multitude of cases to sort through.
To access the Filters setup, just click “Filters” under the “Turbo Gallery” area of your WordPress Dashboard.
The best way to start is to figure what details you would like your gallery visitors to be able to sort by within each Category, or Subcategory.
When adding the filters, first select the main category you would like these filters available to, then, if necessary add the Subcategory you would like it available for. Separate your filter values/ranges with a comma.
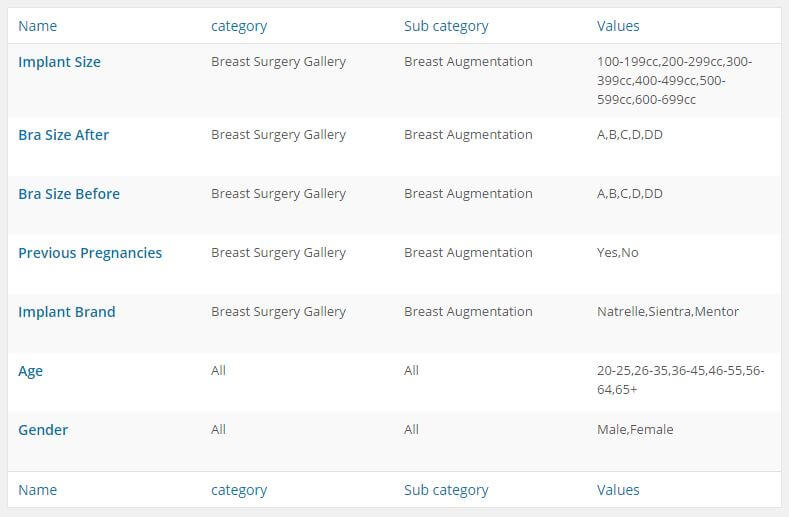
Some examples for this would be “Male or Female” and “Age Ranges” for Category levels, or “Implant Size”, etc for Breast Augmentation. Here is an example of a filters setup:
Once you have setup all of your filters in the filter section, you will need to set the filters for each case. This can be done with the “Bulk Edit” feature found within the “Turbo Gallery(s)” section or you can open each case individually. Please note that if you do not set filter values, the case will not appear when a filter value is selected for the unset filter.
This can be time consuming, but your potential patients will thank you for being so organized!